Address
304 North Cardinal
St. Dorchester Center, MA 02124
Work Hours
Monday to Friday: 7AM - 7PM
Weekend: 10AM - 5PM
Address
304 North Cardinal
St. Dorchester Center, MA 02124
Work Hours
Monday to Friday: 7AM - 7PM
Weekend: 10AM - 5PM
iPhone X and above models Face id can’t recognize the repair method of moving high and moving low
There are many Face ID-free machines on the market, especiallymobile phoneFace ID can’t be unlocked after dropping, and the input interface will prompt to move higher and lower, which makes it inconvenient for users to unlock, because Face ID components are bound with CPU, and can only be repaired after being damaged, but the price is high. Recently, the technology of repairing Face ID in the maintenance market has made a breakthrough. Let’s take a look at the maintenance process of iPhone X and above models whose Face id can’t identify the move higher and lower.
First of all, to repair Face ID, make sure that Face ID components are original machines, which can’t be repaired after replacement. The maintenance success rate is very high by moving up and down.
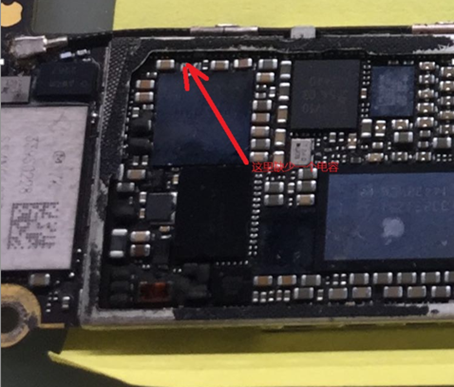
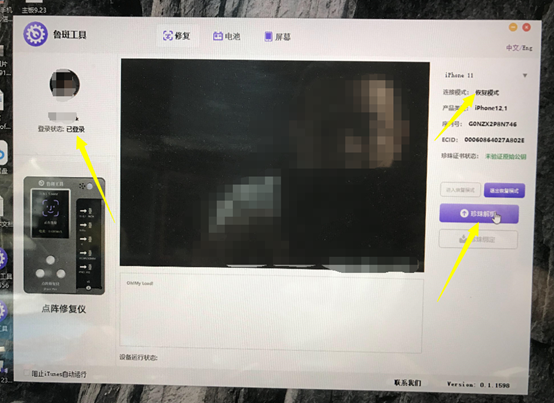
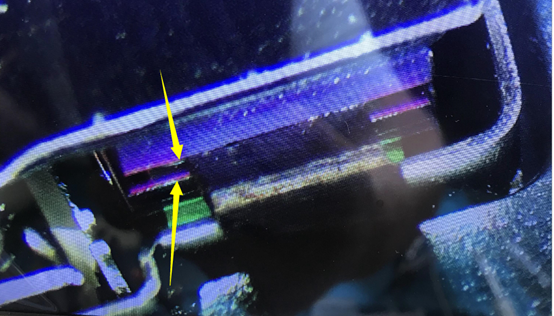
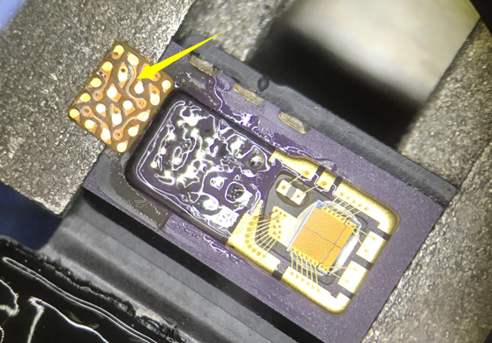
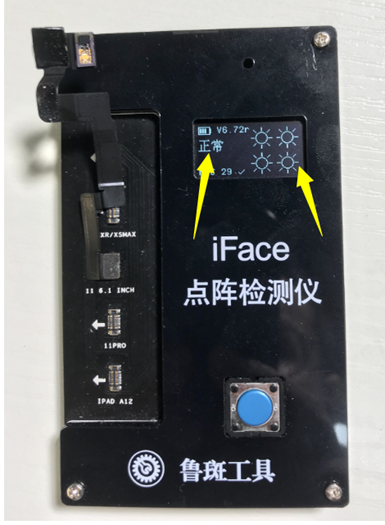
As shown in the figure, the fault phenomenon of moving high and moving low:
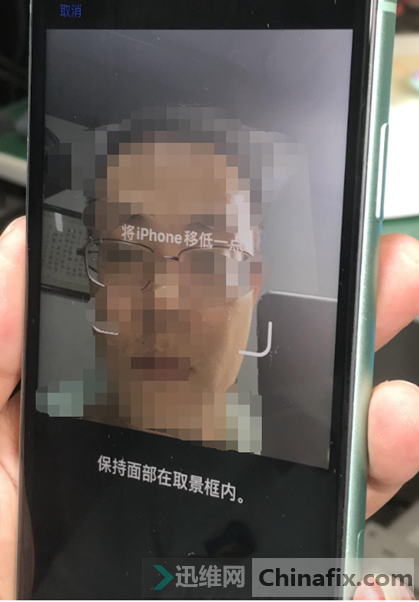
iPhone X and above models Face id can’t recognize the repair method of moving high and moving low.
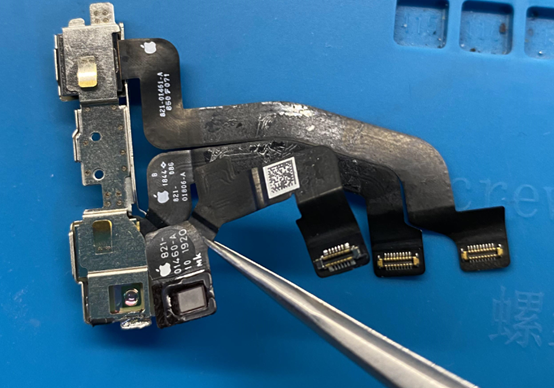
After the fault is determined, we will start the maintenance and repair the tools needed to repair the fault of Face ID, such as dot projector unbinding instrument dot projector testing tool dot projector grinding pen, as shown in the figure:
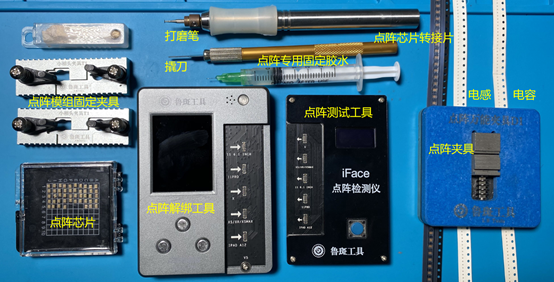
Face id does not recognize the move up and move down repair tool.
After knowing the tools, let’s look at the maintenance process:
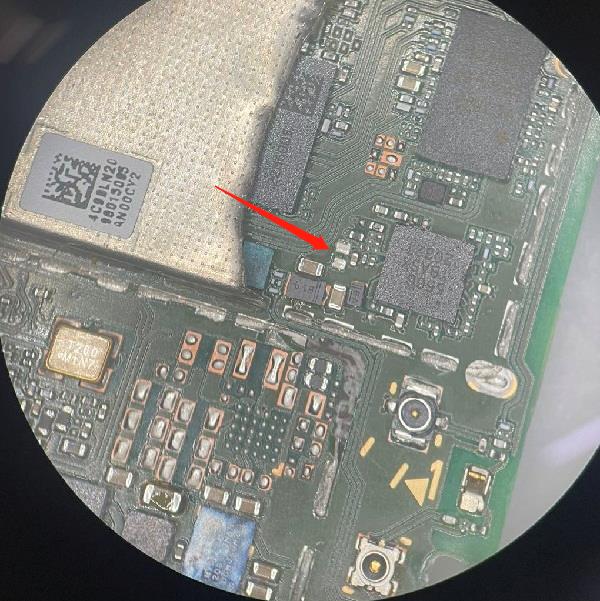
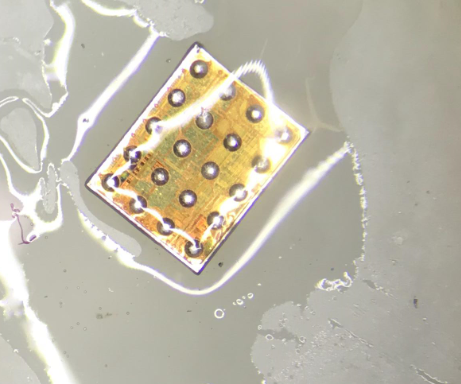
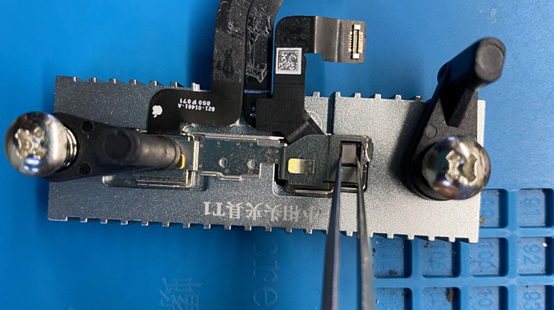
Remove dot projector first, and then determine the fault with a test tool, indicating that the fuse indicates that dot projector is damaged. Figure:
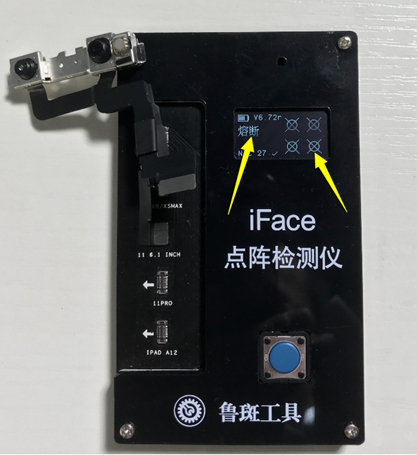
Face id does not recognize moving high and moving low to repair dot projector tester
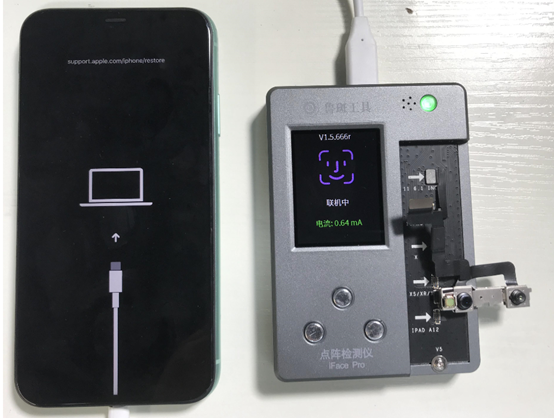
Make sure that dot projector is completely damaged. Let’s replace dot projector chip below. Before replacing, connect the computer unbinding information.dot projector cable is fastened to the unbinding tool, and the mobile phone is connected to the computer. Figure:
The operation interface point of the unbinding tool on the computer (pearl unbinding) is shown in the figure:
dot projector can be disassembled after being untied successfully, as shown in the figure.
Unbinding tools need agency authority, and software without agency authority can’t be used, so for most repair shops, they still can’t be repaired, so they can only be sent to agents for repair.
After successfully untied, let’s dismantle dot projector. The dismantling method of different models is roughly the same. We use a grinder to grind along the frame, so as not to cut dot projector glass.
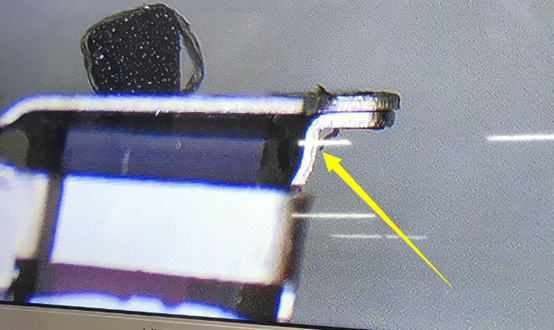
After cutting as shown in the figure:
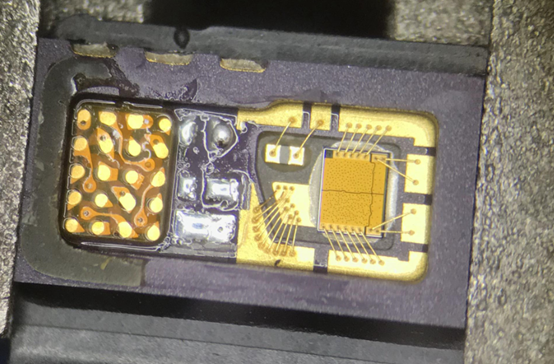
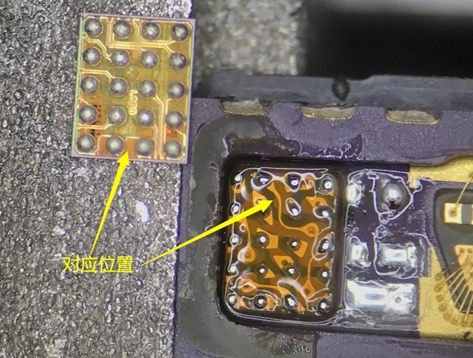
After cutting, we use SMD REWORK STATION to heat at 300 degrees to pry open dot projector glass. Before pry, it is best to observe the corresponding position from top to bottom to facilitate alignment during installation, and the joint between Stop at glass and base. Figure:
After pry it open, we gently lift the iron sheet and remove FPC. Figure:
After removal, the dot projector glass should be kept clean and free of dust. If there is any, blow it off with a leather tiger, and don’t wipe it with anything.
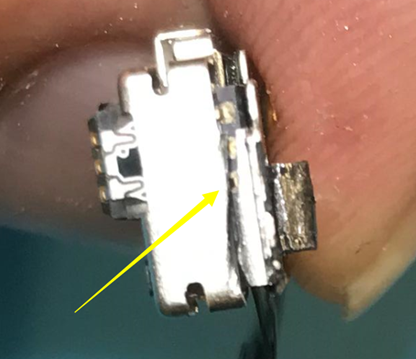
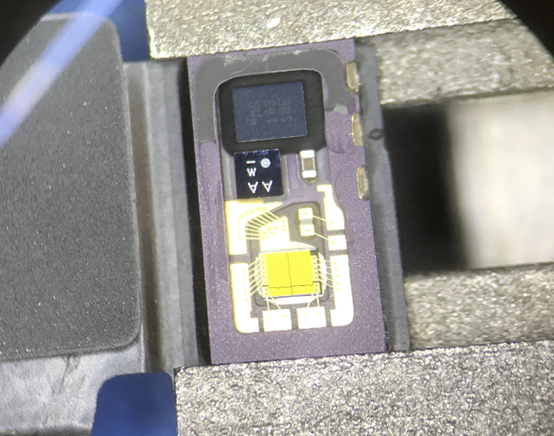
Next, it’s time to replace the chip. We fix dot projector FPC. There is glue on the outside of the frame that can’t be removed. After removal, misalignment is easy to occur when installing alignment. When removing the chip, be careful not to damage dot projector light emitter (yellow) and prevent foreign matter from entering dot projector. Figure:
SMD REWORK STATION, drive to 350 degrees, and remove the chip. Figure:
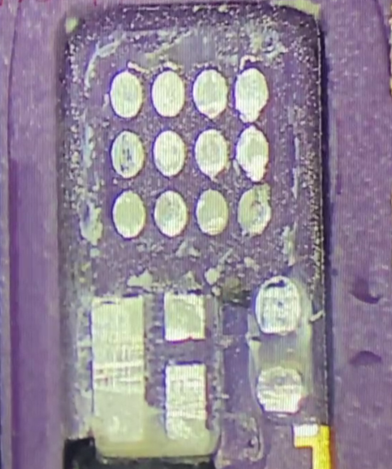
After dismantling, we first put PAD add solder and then solder the adapter, because the original chip is 12 dots, and the chip we want to replace is 20 dots. Don’t make a mistake in the direction of the adapter and bend the line position. Figure:
welding good picture, as shown in the figure:
After the adapter is soldered, our welding chip. (The chip can only be obtained by the agent, and it can be used with the unbinding tool. It is impossible to maintain the chip alone. ) Now the adapter add solder is convenient for welding. After the chip welding is processed, the solder joint will become smaller, otherwise the soldered chip will be too high to withstand easily. Figure:
Adapter add solder.
Chip solder joint Hand solder becomes smaller after light support.welding chip, pay attention to the direction, the dark position of the chip corresponds to the bending line. Figure:
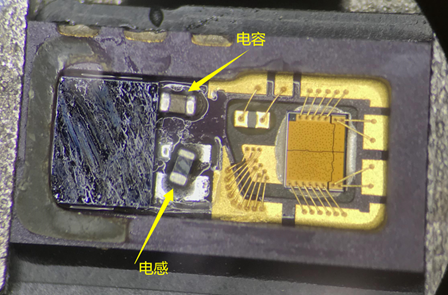
We put the welding chip below, and then add Capacitor Inductor, black Inductor and yellow Capacitor. Figure:
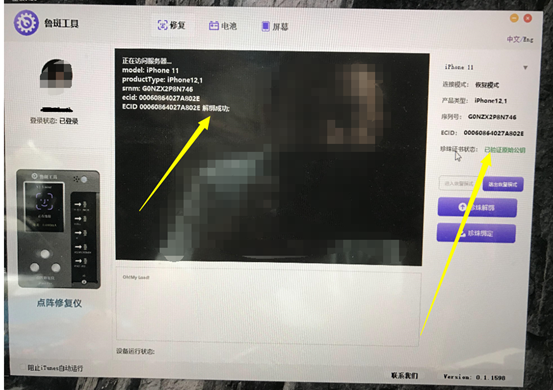
After processing, use the unbinding tool to bind the chip. Figure:
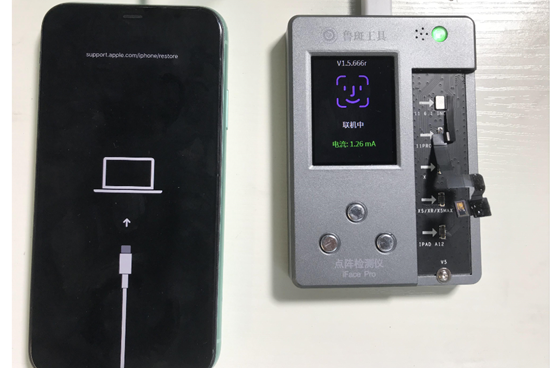
Even the mobile phone, the computer unbinding tool and the computer.
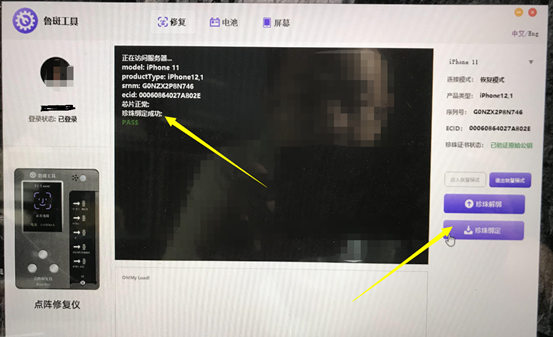
Binding succeeded
After the binding is successful, we use dot projector testing tool to test whether dot projector is normal or not. Figure:
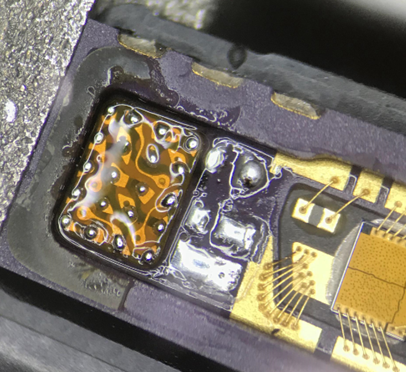
After the test of dot projector is successful, clean Flux first, and then check whether there is any foreign matter in the light emitter and dot projector glass. We will install it when there is no problem. Figure:
After installation, you can properly adjust the angle with tweezers. Because the original glue is there, it is very convenient to align the position. After the position is aligned,Sloder fixture presses it down and then glue it. The glue is dot projector special glue. Figure:
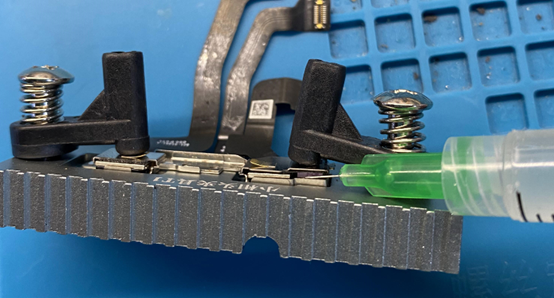
You only need to hit the glue on the upper and lower sides. After the glue is hit, take it to the preheating table for heating and solidification. The preheating table is opened at 120 degrees and heated for 10 minutes or so. After the glue is solidified, we can install it for testing. Figure:

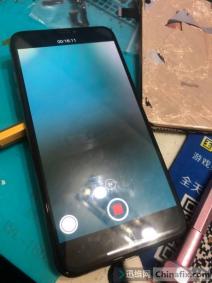
Face ID fault is perfectly repaired.