Address
304 North Cardinal
St. Dorchester Center, MA 02124
Work Hours
Monday to Friday: 7AM - 7PM
Weekend: 10AM - 5PM
Address
304 North Cardinal
St. Dorchester Center, MA 02124
Work Hours
Monday to Friday: 7AM - 7PM
Weekend: 10AM - 5PM
Gigabyte h61m-ds2 repair without startup
Gigabyte h61m-ds2 repair without startup. re installed the power supply, memory, accessories,short-circuit PSW +, successful booting up, the end of repair!
Machine model: Gigabyte h61m-ds2 .
Fault phenomenon:without startup.
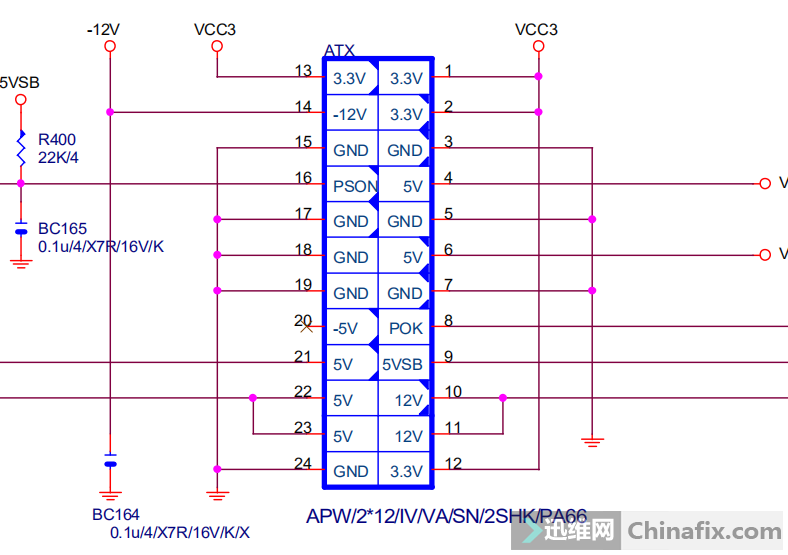
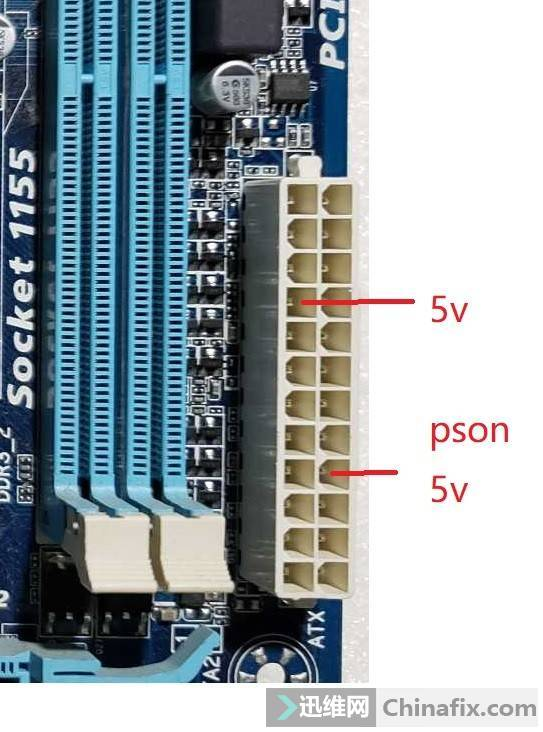
Maintenance process: take out multimeter, measure ATX power socket 9 pin, 16 pin, 9 pin 5VSB = 5.01v (normal) 16 pin pson = 5V (also very normal), respectively measure the resistance to ground is not zero, not Short circuit.
Gigabyte h61m-ds2 repair without startup Figure 1.
Gigabyte h61m-ds2 repair without startup Figure 2.
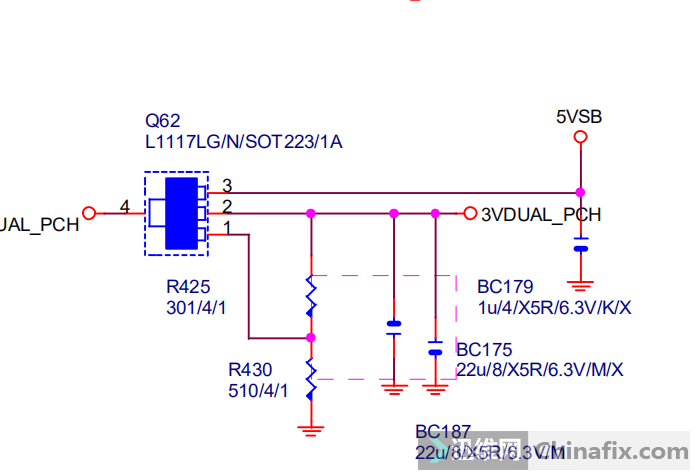
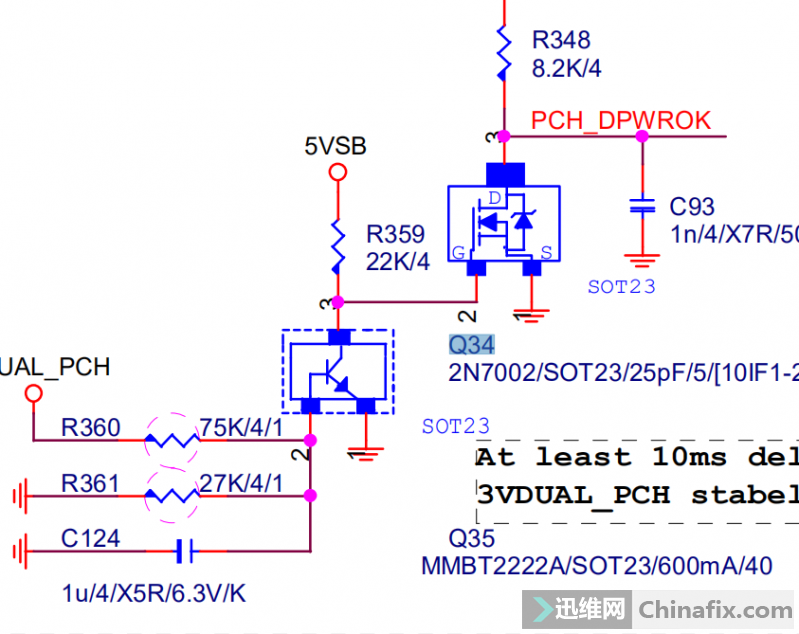
So continue to test, find 1117 voltage regulator module, see if there is 3.3V output.Measure 1 pin 2.26v, 3 pin 5V, 2 pin 3.41v (also normal) as shown in the following figure:
Gigabyte h61m-ds2 repair without startup Figure 3.
Gigabyte h61m-ds2 repair without startup Figure 4.
Continue to check and measure the pins VCC on the main board power on socket panel. The VCC is normal when the machine is turned on and standby, but the reset VCC is also normal.Therefore, measure the VCC of each pin of pin on the main board boot panel to see the power_On has 3.3V.Meanwhile, reset reset VCC, CMOS discharge VCC, who let them all together.
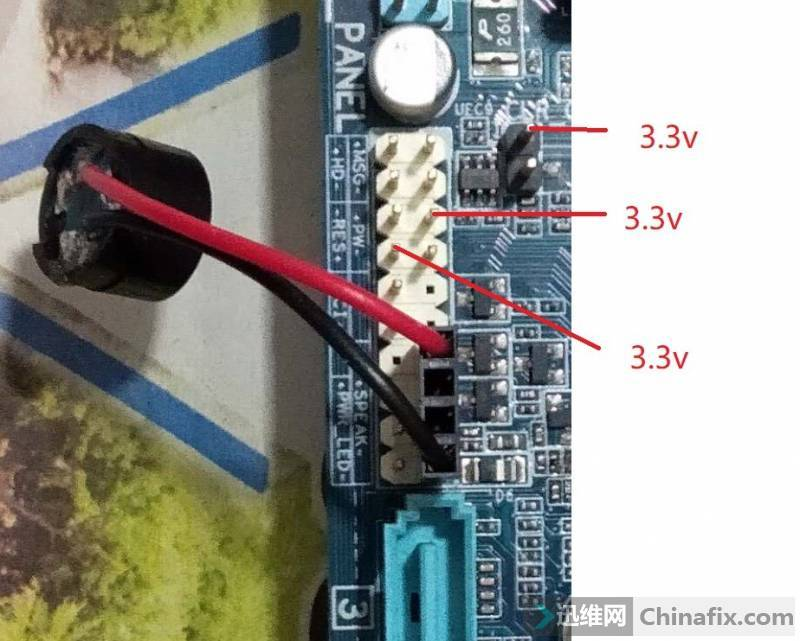
Gigabyte h61m-ds2 repair without startup Figure 5.
Gigabyte h61m-ds2 repair without startup Figure 6.
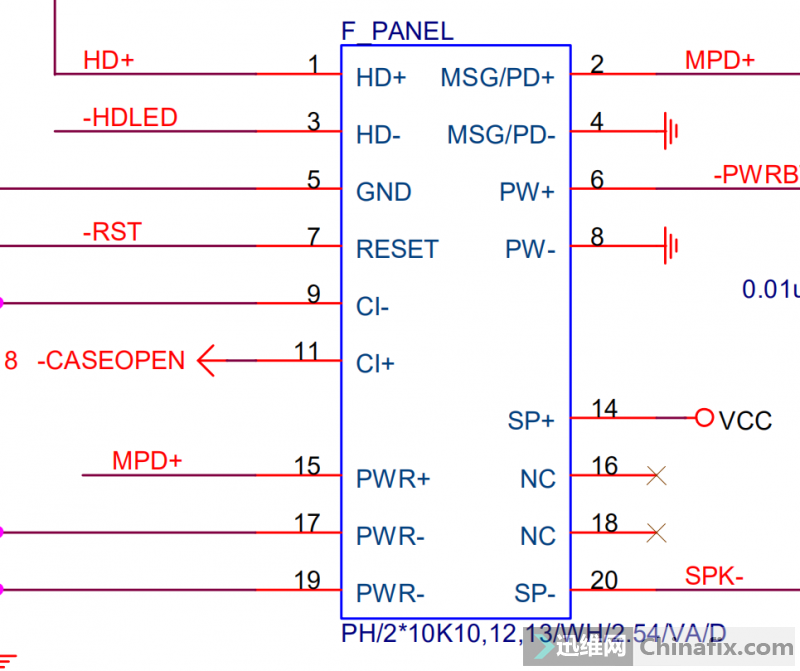
VCC is in normal range?
Gigabyte h61m-ds2 repair without startup Figure 7.
Gigabyte h61m-ds2 repair without startup Figure 8.
The next step is to test switch VCC. First check schematic, find IO chip and test whether VCC VCC is normal.
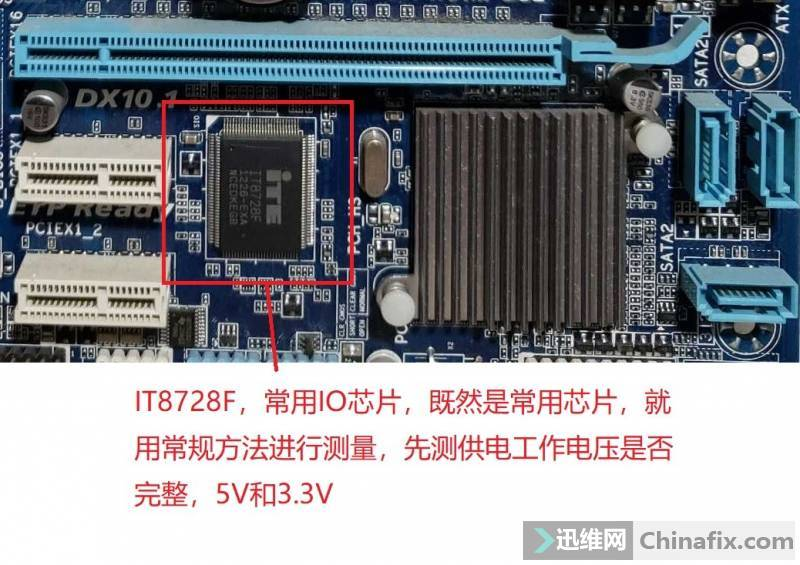
Gigabyte h61m-ds2 repair without startup Figure 9.
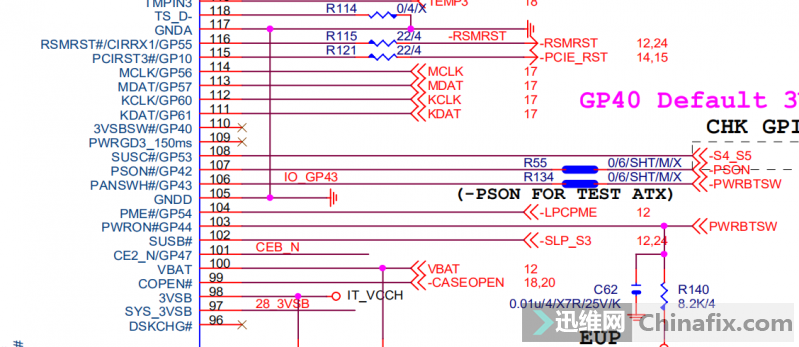
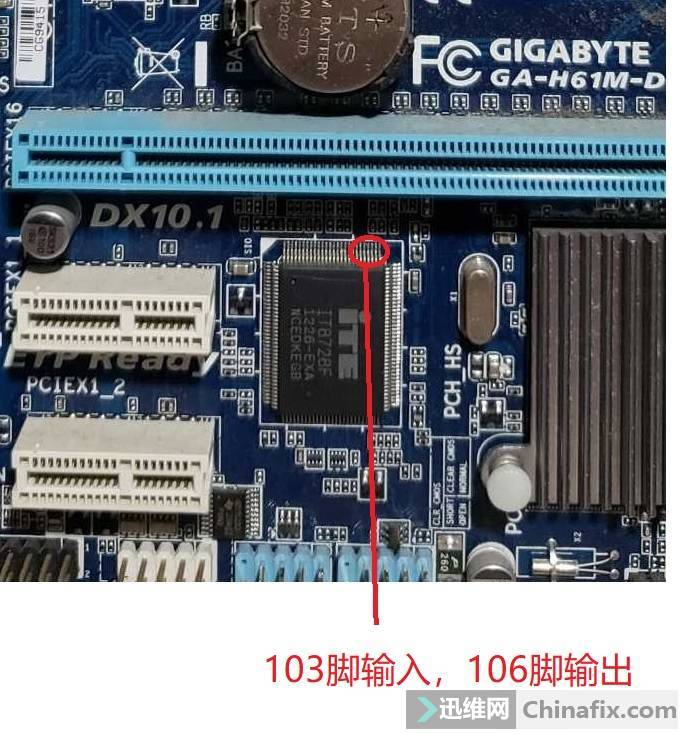
Find the 103 pin of IO, press and hold the multimeter probe, and at the same time use the tweezers PW + / PW – of short-circuit panel.After observing the change of multimeter, it was found that there was a change of 3.4V — 0V — 3.4V,switch,VCC entered io.Then, 106 pin was measured again, and the variation was 3.4V — 0V — 3.4V. IO sent switch signal to Nanqiao, which was very normal.
Gigabyte h61m-ds2 repair without startup Figure 10.
Gigabyte h61m-ds2 repair without startup Figure 11.
Up to now,switch and VCC have successfully entered IO and output smoothly after IO processing.From the perspective of high probability events, the IO chip should have no problem.
Since the IO part of the signal is normal, then continue to search down along the switch signal.After 103 pin-pwrbtsw output of IO, 3vdual_After PCH and r140 are pulled up, they go straight to the South Bridge. After receiving the switch signal, the South Bridge will give io a “agree to power on signal” if the detection is normal, which is SLP_S3.
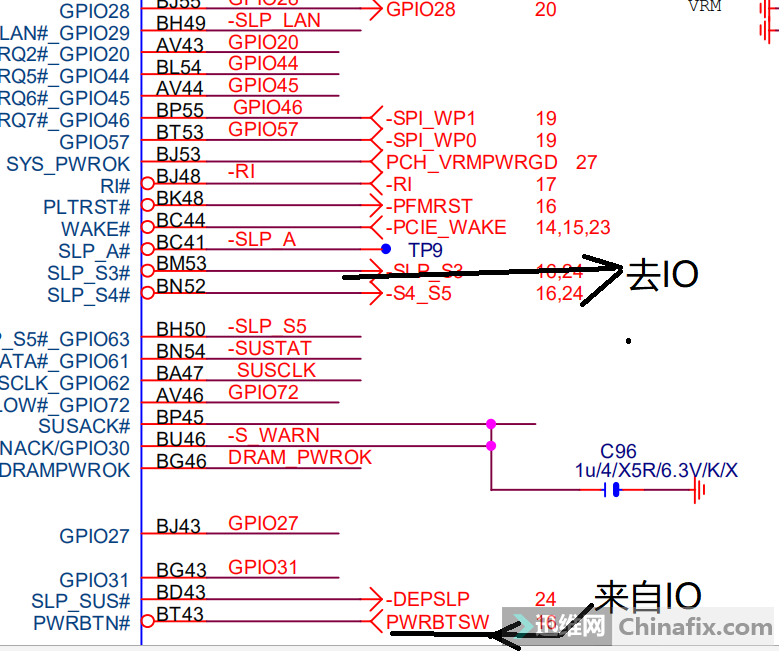
So I took multimeter to test 102 pin of IO, and found a problem. When using tweezers switch, there was no high VCC.Therefore, if the IO does not receive the power on signal, it does not turn on the power.
Gigabyte h61m-ds2 repair without startup Figure 12.
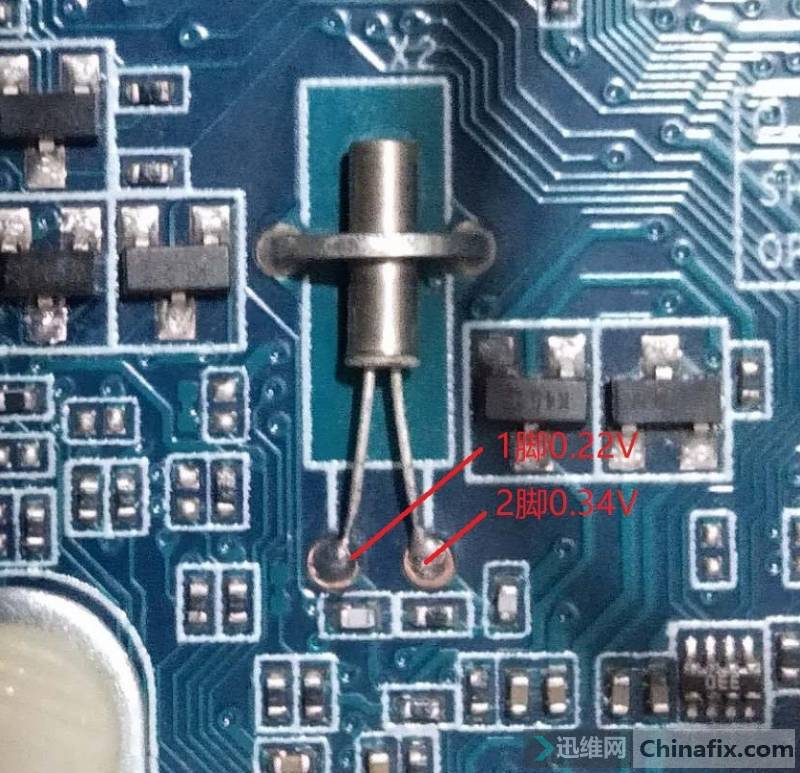
Find out why the South Bridge does not have slp-s3 VCC, and finally find an area around the South Bridge.3 pin PCH of q34 in the above figure_Dpwrok does not have VCC. The VCC indicates that the deep sleep VCC of South Bridge is normal. There is no VCC here, which reminds the south bridge that VCC is abnormal, so Nanqiao does not allow the IO power on.
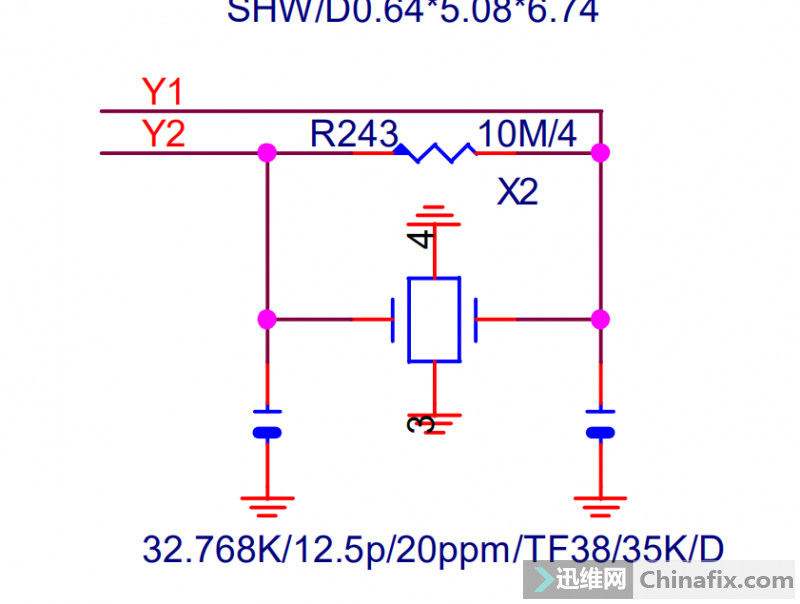
pin on’t test the output resistance of the other two models, the multimeter and the schematic are almost the same, you can not find the maximum resistance of the multimeter and the cxt31.
1.Capacitor short-circuit current to the ground (the resistance of 3 pin to the ground was not found to be 0 during the measurement)
2. Pull up resistor r348 Open circuit.
Gigabyte h61m-ds2 repair without startup Figure 13.
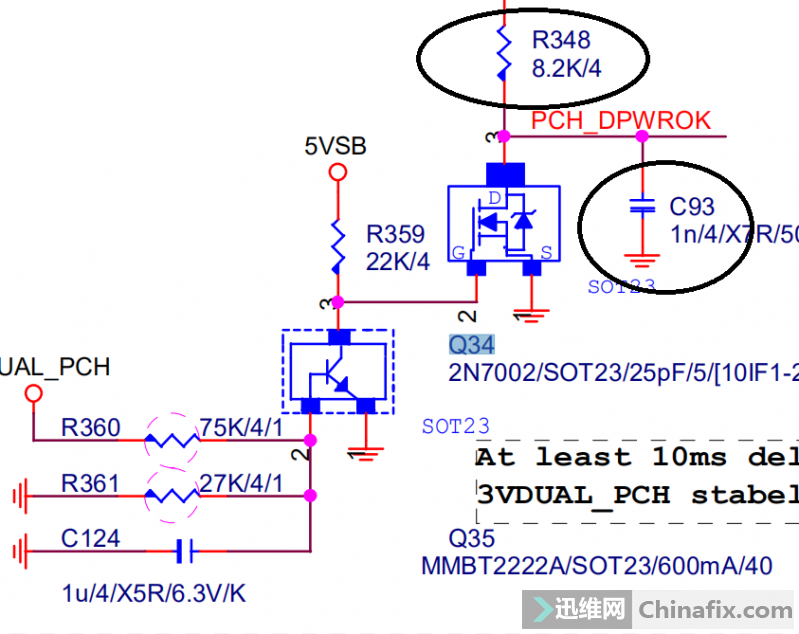
Gigabyte h61m-ds2 repair without startup Figure 14.
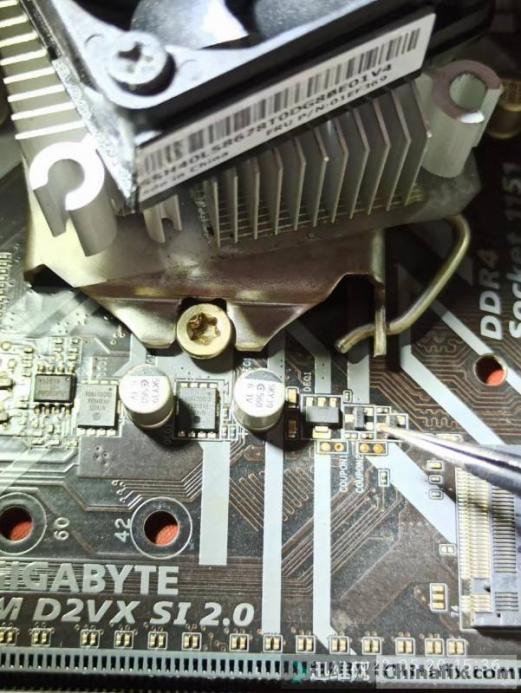
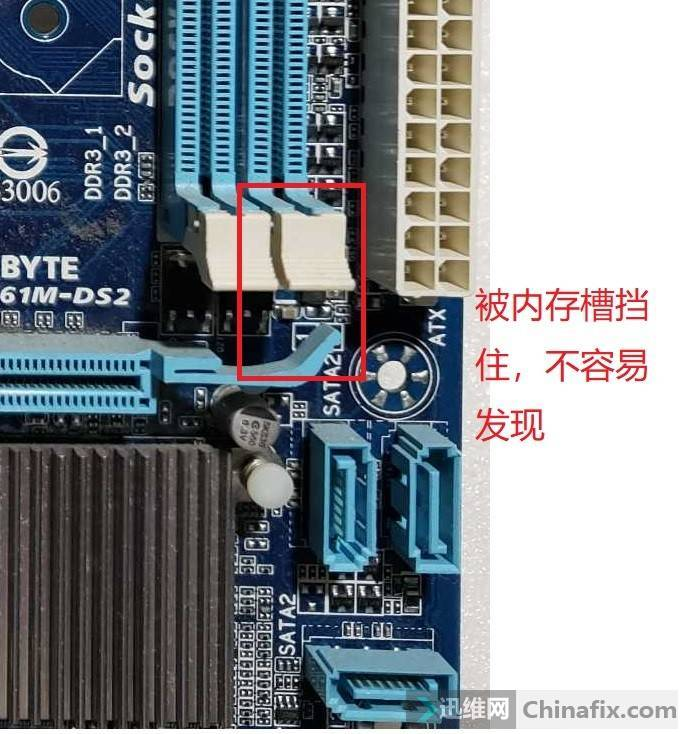
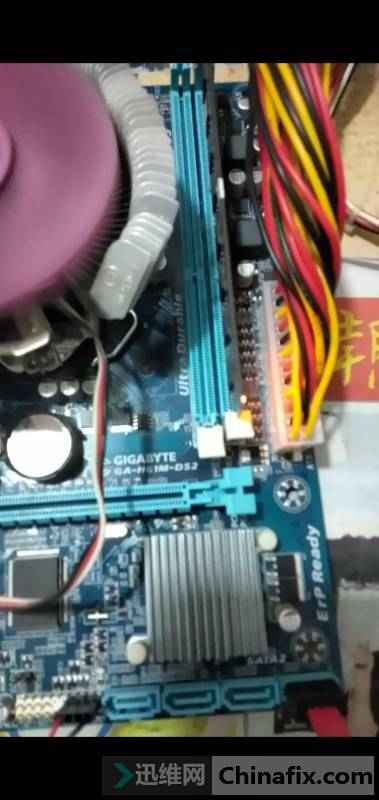
Remove Capacitor first and try it out (the photo of the removed board is shown in the figure below)

Gigabyte h61m-ds2 repair without startup Figure 15.
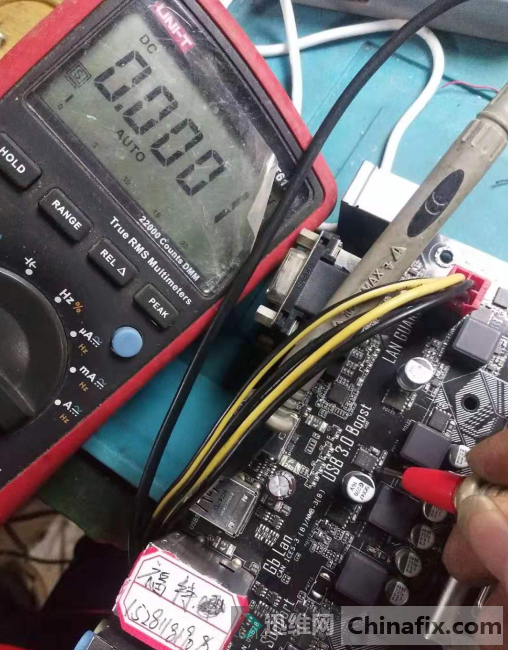
After the C93 Capacitor is removed, the r348 is not in a hurry, and the machine is put on trial.Re install the power supply, memory, accessories.
There must be a buzzer!(because there is no PCI slot on the board, code runner cannot be installed)
Hold the tweezers,short-circuit for PSW +, and finally the CPU fan turns on.Then, with this sound, the motherboard started, the self-test passed, and the maintenance ended.
Gigabyte h61m-ds2 repair without startup Figure 16.